How to Draw Hands and Faces on Fashion Croquis (Without the Fear)
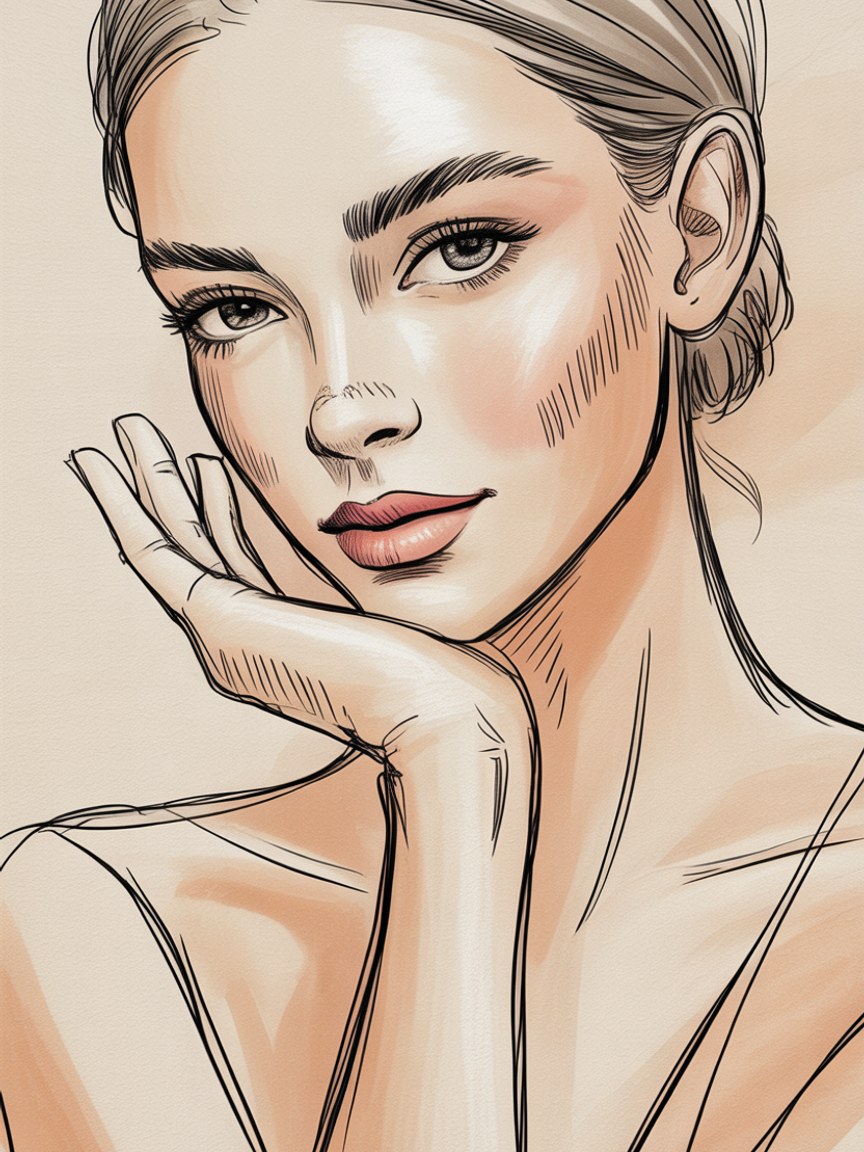
Ask any fashion illustration student what part of the croquis makes them want to flip the sketchbook across the room, and the answer is almost always the same: hands and faces. Limbs can be traced. Proportions can be memorized. But hands and faces feel personal, and that vulnerability is exactly what makes them hard. The good news is that fashion illustration has its own rules, and those rules are far more forgiving than the academic figure drawing you may have tried and dreaded before.
Why Fashion Faces Are Not Portrait Drawing
The first thing to understand is that a fashion croquis face is not a likeness. It is a mood. The goal is to communicate attitude, editorial, soft, fierce, dreamy, not to render a specific person. That shift changes the challenge entirely. You are designing a face the same way you design a garment: with line quality, proportion, and intention, not with the anatomical precision a portrait class would demand.
Once you let go of "getting it to look right" and replace it with "getting it to feel right," the pressure drops. A fashion face only has one job: support the garment and the pose without pulling focus away from either.
The Fashion Face Formula
Start every face with a thin oval, then divide it with a center vertical line and three horizontal guidelines. Those four lines are your scaffold, and the same scaffold works whether the face is naturalistic or stylized:
- Eyes sit at the halfway point of the head (lower than most beginners expect)
- Nose lands halfway between the eyes and the chin
- Mouth sits two-thirds of the way between the nose and the chin
- Eyes are roughly one eye-width apart
Everything after that scaffold is style. Some illustrators enlarge the eyes for a doe-eyed editorial look; others compress the whole lower face for a sharper, more graphic silhouette. Both are correct as long as the underlying proportions stay consistent from figure to figure.
Building the Features: Eyes, Brows, and Mouth
For eye style, less is almost always more. A single confident curved line for the upper lid, a suggestion of lashes, and a small highlight dot in the iris reads as polished and editorial. Over-detailed eyes shrink the face and pull attention away from the clothes, which is the opposite of your goal.
The eyebrow does more emotional work than most illustrators realize. A brow set slightly high and arched reads as surprised or glamorous; a flatter, closer brow reads as cool and detached, the classic runway expression. Draw the brow as a single tapered stroke, thick at the inner corner and thinning toward the outer edge.
The mouth is where restraint pays off fastest. A closed mouth needs only two lines: the upper lip line and a slightly longer lower line beneath it, left open at the corners so it does not read as a hard seam. Skip the philtrum and nostril detail unless you are working large scale. At croquis size, those marks read as clutter rather than realism.
The Fashion Profile and Three-Quarter View
Three-quarter and profile views are where many illustrators stall. The trick is to start with the full-face oval, then slice away roughly one-third of it on the far side to create the illusion of turn. The far eye becomes a narrow sliver, the nose extends slightly past the face's edge, and the lips align beneath the nose with the far corner barely visible.
Practice the profile separately from your full croquis. Fill a page with nothing but heads in profile until the proportions feel natural. Isolated practice beats repeating full figures with a face you are not happy with, because you are not also managing pose, garment, and proportion at the same time.
Hands: Simplify, Then Simplify Again
Fashion illustration hands are not anatomy diagrams. They are gestures. The most common and elegant approach is the paddle hand: the four fingers are grouped together as a single soft shape, with only the thumb separated. This reads as a complete hand with minimal complexity and keeps the eye moving instead of stopping to analyze knuckles.
For a resting hand at the side of the body, draw a slightly elongated oval with the thumb angled away and a gentle taper toward the wrist. For a hand on the hip, the key angles are the wrist bend and a slight foreshortening of the palm, both described with just two or three lines. The instinct to draw every finger individually is the single biggest thing that ages an otherwise strong croquis into something amateur-looking.
Common Hand Positions to Drill
- Hand at rest (arm hanging naturally)
- Hand on hip (the fashion classic)
- Hand holding a clutch or bag
- Fingers spread (for editorial drama)
Work through this list until each position is automatic. Most working illustrators reuse the same four or five hand poses across an entire career, redrawn thousands of times until the hand knows where to go before the pencil touches paper.
Mistakes That Quietly Age a Croquis
A few habits show up over and over in student work, and every one of them is an easy fix once you know to look for it:
- Eyes set too high. Beginners almost always draw the eyes in the upper third of the head instead of at the true halfway point. Lower them and the face instantly reads as more sophisticated.
- Individually rendered fingers. Separating all four fingers on a small croquis hand makes it look stiff and overworked. Group them into the paddle shape instead.
- Symmetrical, static mouths. A perfectly centered, perfectly even mouth reads as flat. A tiny asymmetry, one corner just slightly higher, adds life.
- Over-erasing. Repeatedly erasing and redrawing the same line removes the confidence that makes fashion linework feel intentional. A slightly imperfect line drawn once beats a "corrected" line drawn six times.
The Mindset Shift That Changes Everything
Perfectionism is the enemy of a good croquis. Fashion illustration is not illustration that happens to involve fashion, it is a design communication tool with its own visual language, and that language values confidence of line over accuracy of anatomy.
Draw the face in five strokes. If it looks off, draw it again in five strokes. Do not erase and redraw the same line six times. The hesitation shows in the final mark as much as the mistake does.
One useful exercise: set a timer for sixty seconds and draw one complete croquis face, eyes, nose, mouth, brows, with no erasing allowed. Review it, adjust your approach, and do it again. After twenty rounds of this, your hand knows where to go without asking your brain for permission. Run the same drill with a single hand position instead of a face and you will see the same jump in confidence within a week.
Bringing Faces and Hands Into the Full Figure
Faces and hands only look confident when they sit on a croquis that already has solid bones. If your figure proportions wander from sketch to sketch, no amount of face or hand practice will make the final drawing feel professional. Before you drill features in isolation, make sure your underlying figure is built on a consistent framework. Our 9-head proportion system guide walks through the elongated fashion croquis proportions that every strong illustration builds on, and pairs naturally with the flats you will eventually draw beside your figures, covered in our guide to sketching fashion flats.
Recommended Supplies for Faces and Hands
For Fine Facial Linework
Sakura Pigma Micron Set (6 pens) gives you the 005 and 01 tips that keep eyelash lines, brow strokes, and paddle hand outlines crisp instead of clumsy.
For Underdrawing Guidelines
Prismacolor Col-Erase Pencils (24-pack) lay down a light non-photo blue scaffold for your face oval and hand shapes that vanishes once you ink over it.
For Construction Practice
Staedtler Mars Lumograph 12-set covers the 2H guidelines and softer grades you need to sketch faces and hands before committing to ink.
For Sixty-Second Drills
Strathmore 400 Series Sketch Pad is cheap enough per page that you will not hesitate to fill it with rapid-fire face and hand repetitions.
Practice Faces and Hands on a Real Figure
Our Fashion Croquis Template Sketchbook: Paris Edition gives you 300 pages of light grey 9-head figure templates with scenic Paris backgrounds, so every face and hand drill lands on a proportionally correct body instead of a blank page.
Get the Paris EditionSome links above are affiliate links. If you purchase through them, we may earn a small commission at no extra cost to you. We only recommend products we genuinely use or believe in.